
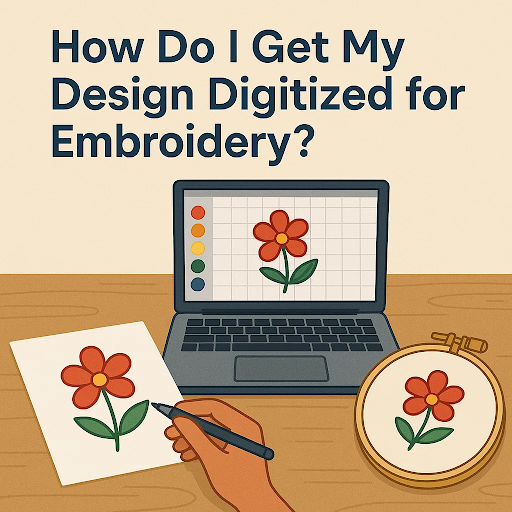
The easiest way to understand how to digitize for embroidery is this: your artwork must be turned into a stitch file that an embroidery machine can read. This process, called digitizing, needs special software and careful setup. Many people use professional digitizers to make sure the design stitches out cleanly and looks right on fabric.
Key Takeaways
- Digitizing converts artwork into stitch files that embroidery machines can read.
- You can either learn software or hire a professional service for the job.
- The process includes artwork prep, stitch mapping, density adjustment, underlay, and fabric optimization.
- Quality digitizing prevents wasted time, broken threads, and poor results.
- Infinite Digitizing offers trusted embroidery digitizing services in the USA for businesses and individuals
What Does It Mean to Digitize a Design for Embroidery?
Digitizing for embroidery means taking artwork such as a logo, graphic, or custom design and turning it into stitch commands. These commands tell the machine where to place stitches, how dense they should be, and what direction they should follow. Without proper digitizing, even the best design may look distorted, messy, or unreadable when stitched.
How to Digitize for Embroidery?
If you want to turn your design into a stitch-ready file, there are two main ways to do it:
1. Using Embroidery Digitizing Software
Programs like Wilcom, Hatch, or Brother PE-Design let you manually convert your artwork into stitches. With these tools, you can decide the stitch type, adjust density, add underlay, and control the flow of the design. The downside is that learning the software takes time, and beginners often face a steep learning curve. It works best if you enjoy the technical side of embroidery and plan to digitize designs regularly.
2. Hiring a Professional Digitizing Service
For many people, outsourcing is the smarter choice. Professional digitizers already have the skills, software, and experience to prepare your design correctly for stitching. This saves you time, avoids trial-and-error mistakes, and ensures your embroidery comes out clean and professional. It’s especially useful if you need high-quality results quickly or don’t want to spend hours mastering complex software
Pro tip: If your design includes small text or fine details, it’s best to let a professional handle it. They know how to adjust settings so the design looks crisp on fabric.
What Are the Steps to Digitize for Embroidery?
Digitizing for embroidery follows a step-by-step process, and every stage plays a role in how the final design turns out. To make it clear, let’s walk through each step one by one.
1. Prepare the Artwork
Start with a clean, high-resolution design file. Vector formats (like AI or EPS) work best because they are scalable and easier to trace.
2. Import into Digitizing Software
Load the artwork into your digitizing software. This is where you’ll map out the stitch sequence and choose the stitch type.
3. Assign Stitch Types
Different parts of the design require different stitches. For example:
- Satin stitches for borders or small text
- Fill stitches for large solid areas
- Run stitches for fine outlines or details
4. Adjust Stitch Density and Direction
Density controls how close the stitches are to each other. If they’re packed too tightly, the fabric can wrinkle. If they’re too far apart, the design may look thin or unfinished. Stitch direction also matters because it changes how the light hits the thread, giving the design more depth and texture. For example, on a logo with curved letters, the right stitch direction can make them look smooth and shiny, while the wrong direction can make them look flat or uneven.
5. Add Underlay Stitches
The underlay works like the base layer of embroidery. It stabilizes the fabric and gives the top stitches something to grip onto. Without it, the design can shift, stretch, or look uneven. For example, if you’re stitching on a stretchy T-shirt, proper underlay keeps the design from pulling the fabric out of shape.
6. Optimize for Fabric Type
A design that works on cotton may not work the same on denim, polyester, or caps. Professional digitizers adjust settings for each material to ensure consistency.
7. Save in Machine Format
Once complete, export the file into the format your embroidery machine accepts, such as DST, PES, EXP, or JEF
Why Does Professional Digitizing Matter?
While software gives you the tools, the skill lies in knowing how to use them. Poorly digitized files often result in broken threads, jagged edges, unreadable text, or wasted production time. On the other hand, a professional file runs smoothly on the machine, saving both time and material.
For businesses, the difference between “okay” digitizing and professional-quality digitizing can impact brand reputation, especially if you’re selling custom apparel.
Infinite Digitizing: Your Trusted Partner in the USA
If you’re looking for expert help with digitizing, Infinite Digitizing in the USA provides reliable solutions. From embroidery digitizing to vector art, custom patches, 3D puff digitizing, applique, and pattern digitizing, our services cover every need. With fast turnaround times, high-quality stitch files, and responsive customer support, we have earned the trust of apparel brands, businesses, and individuals worldwide.
Ready to get started? Contact Infinite Digitizing today and have your design turned into a flawless embroidery file.
FAQs About How to Digitize for Embroidery
Yes, but it requires learning complex software and practicing often. If you’re short on time or need professional results, outsourcing to a digitizing service is usually the smarter choice.
Simple logos may cost around $8–$15, while complex designs can go higher depending on stitch count and detail. The investment is worth it for high-quality, machine-ready files.
Not always. Fabrics behave differently, stretchy materials need lighter density, while thicker fabrics may require stronger underlay. A skilled digitizer customizes files for each fabric type.
Yes. Files like DST or PES need embroidery software to open, edit, or preview. Most machine manufacturers also provide their own viewing software.
Turnaround depends on complexity. Some designs can be digitized within a few hours, while highly detailed work may take longer. Professional services often provide 24-hour delivery options.


