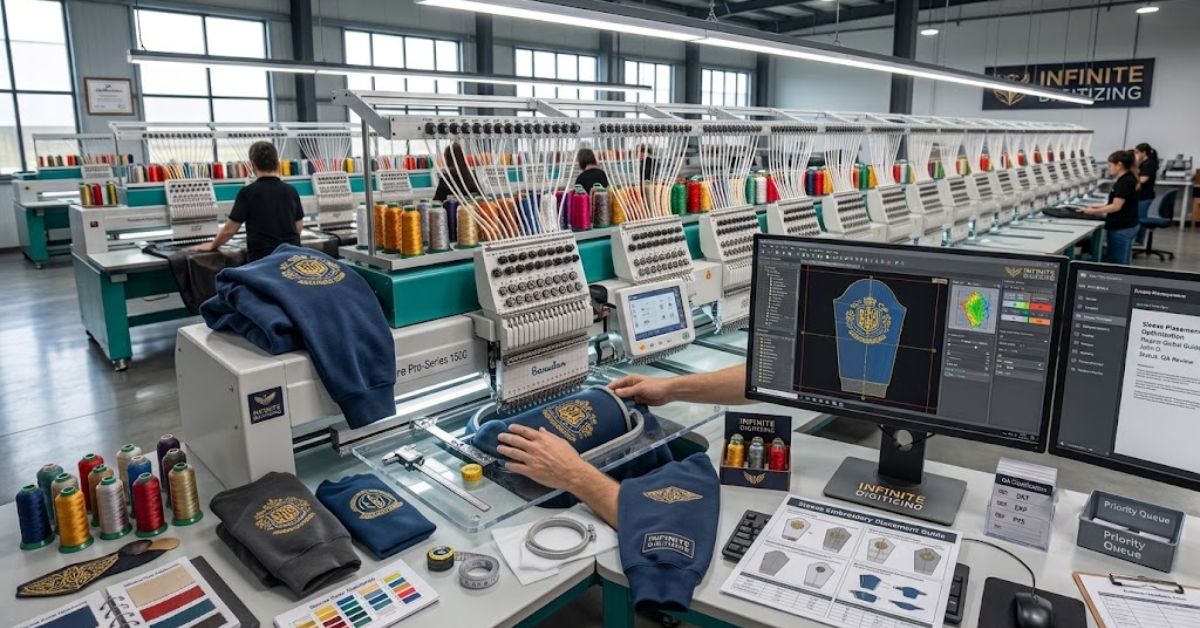
Most apparel companies pay attention only to the placement of their embroidery designs on the chest and backs, leaving the sleeves completely untouched. Incorporating sleeve embroidery helps create high-value retail items out of basic hoodies, jackets, and athletic wear.
Being narrow and round tubes, sleeves need a totally unique treatment compared to flat panels of shirts. With sleeve digitizing services, you can ensure that your designs are properly created for the unique shape of the sleeve material without any puckering problems.
What Is Sleeve Embroidery?
A brand name, logo, monogram, or design on the sleeve of a jacket, sweatshirt, or hoodie is known as sleeve embroidery. This is an excellent method to use for secondary branding or artistic touches.
- Distinct Geometries: Designing something for a sleeve presents its own set of challenges because of the shape of the sleeve.
- Common Uses: Logos representing team spirit, personalized gifts, brand names on uniforms or streetwear.
- Technical Adjustments: Flat surfaces react differently to needles than cylinders do, meaning digitizing for embroidery requires specific adjustments to stitch paths and density.
You can look at our easy guide on Kinds of Stitches in Embroidery to see how different filling and satin stitches work on curved shapes.
Why Sleeve Placement Matters for a Clean Finish
Logo Placement can make or break your entire project. It determines whether a design looks intentional or feels cluttered and misplaced.
- Taper and Sizing: Sizing and orientation are entirely dependent on the sleeve taper.
- Placement Styles: Horizontal logos look fantastic on the upper arm, while vertical writing is ideal for the forearm.
- Avoiding Mistakes: One of the main causes of an embroidered design becoming distorted after it is placed on is inadequate planning.
Verdict: Logo Placement should be carefully planned and marked before you touch a hoop.
Popular Sleeve Embroidery Placements
Different garment styles and branding goals call for distinct placement zones. Here is a quick reference guide to help you choose the right spot for your next project:
| Placement | Best For | Design Size |
|---|---|---|
| Upper Sleeve | Team logos, mascots, brand emblems | Medium–Large |
| Lower Inside Sleeve | Hidden names, personal quotes, dates | Small–Medium |
| Cuff | Monograms, small symbols, minimalist tags | Small |
What You Need Before You Start
Successfully diving into Sleeve Embroidery requires gathering the right tools ahead of time. Having everything on hand prevents frustrating mid-project pauses:
- A seam ripper, chalk for marking, and a soft ruler for measuring.
- The correct stabilizer weight (such as no-show mesh or sticky stabilizer depending on the fabric stretch).
- A specialized sleeve hoop (long and narrow) or standard hoops configured for smaller, tight cuff areas.
Physical equipment matters immensely, but the underlying design file is what truly dictates your success, which leads directly to how your art is digitized through professional embroidery digitizing in modern apparel production.
How Sleeve Embroidery Is Done (Hooping Methods)
Mastering Garment Embroidery on a sleeve often comes down to choosing the right hooping method for the specific clothing item you are working with:
- The Sleeve Hoop Method: Great for clothes with big sleeves. Center your design at either the shoulder seam or the underarm seam, hoop your fabric with the appropriate stabilizer, and mount it on the cylinder of your machine.
- The Open-Seam Method: Employed when you have an extremely narrow cuff or a very heavy jacket and the usual hoop cannot be inserted in the sleeve barrel. At times, professionals resort to opening up a small portion of the seam, hooping the fabric, stitching the design, and then sewing up the seam again.
- The Cuff Method: Position your hoop near the wrist area, accounting for thick fabric layers, buttons, and snaps. Utilizing custom embroidery digitizing ensures these structural hurdles are properly managed.
Why Digitizing Quality Makes or Breaks a Sleeve Design
Sleeves are narrow, curved, and constantly shifting. A flat-file design that looks amazing on a T-shirt chest will frequently pucker or distort on a round sleeve.
- Distortion Risks: Push and pull distortion is much more noticeable on tubular garment sections.
- Professional Files: Getting a properly digitized file from top-tier custom embroidery digitizing services helps prevent thread breaks and puckering.
- Our Approach: At Infinite Digitizing, our specialized sleeve embroidery digitizing service accounts for sleeve curvature, exact fabric tension, and optimal stabilizer pairing.
If you want to see how expert digitizers handle tricky curves and fabric tension, explore our dedicated sleeve workflows: Sleeves Digitizing.
DIY vs. Professional Sleeve Digitizing Services
Auto-punch software is fine for simple monograms, but complex logos benefit from expert handling. Relying solely on automated templates often leads to unexpected design shifts and needle frustration.
- Precision Crafting: Expert files mean no more constant thread breakage, machine jams, or waste of finished garments.
- Complex Scaling: Professional digitizers carefully adjust density and underlay layers to ensure detailed art fits perfectly on tight cylindrical shapes.
- Fast Turnaround: Infinite Digitizing offers reliable embroidery digitizing services across all garment types.
Compare DIY vs Professional Digitizing →
Common Sleeve Embroidery Mistakes to Avoid
Even expert embroiderers may have issues if they don’t consider the following key rules of Sleeve Embroidery:
- Not marking the center point before putting the fabric in the hoop.
- Selecting the wrong stabilizer weight (lightweight tearaway instead of cutaway or mesh for heavyweight sweatshirt fleece fabric, for example).
- Choosing a pattern that is too large and positioning it too near the cuff seam.
- Running an un-optimized or flat-format file on a curved garment section.
Most sleeve embroidery problems occur due to the incorrect placement or lack of modification of the digitized file.
Conclusion
Sleeve embroidery is an excellent way to improve your custom clothing, taking hoodies and jackets from DIY to retail quality with ease. Using sleeve embroidery requires correct positioning, correct hooping technique, and the right designs for the best results.
Choose Infinite Digitizing for expert sleeve embroidery digitizing that eliminates fabric distortion and guarantees retail-ready precision.
FAQs
1. What is sleeve embroidery?
A: Sleeve embroidery is stitching custom branding or artwork directly onto the sleeve of a garment.
2. What is the standard sleeve embroidery size?
A: Sizes range from small 1-inch cuff monograms to 6-inch upper sleeve logos.
3. Where should a logo be placed on a sleeve?
A: Place logos on the upper bicep for visibility or near the cuff for minimalist accents.
4. What fabrics work best for sleeve embroidery?
A: Heavy cotton, fleece, polyester-blended, and performance-knit jackets work best.
5. Why is sleeve digitizing important?
A: Digitizing adjusts stitch paths for curved tubular fabrics to prevent puckering and distortion.