Good 3D puff digitizing depends on two choices made before sewing: foam thickness and satin column width. Nailing these numbers prevents messy foam exposure, flat lettering, and broken threads. Whether customizing caps or hoodies, mastering this craft balances physical materials with machine physics. Utilizing reliable benchmarks like Melco guidelines ensures crisp, elevated results every single time you stitch a design.
Why Foam Thickness and Column Width Decide Your Puff Results
The embroidery foam works because the needle of the machine pierces and tears the foam while the satin stitch actually catches and hides it. If your foam is thick for the narrow column, the stitches will cut it open like a knife through the cake. Conversely, when your embossed foam is thin, but the satin column is wide, the lettering comes out dull.
Getting to know about the interaction between 3D Puff Embroidery, embroidery foam, and columns can help you execute them flawlessly. Learn more about the reason why textured letters are so popular today in fashion by taking a look at our guide on why puff designs keep trending.
Quick Settings Cheat Sheet
To give you a quick reference when setting up your software for 3D Puff Embroidery, here is a breakdown of standard commercial values:
| Setting | Recommended Starting Point | Why It Matters |
|---|---|---|
| Foam Thickness | 2–3 mm (maximum 5 mm) | Creates height without trapping the needle shank. |
| Satin Column Width | 30–110 pt (approximately 3–11 mm) | Covers the foam while maintaining stitch tension. |
| Switch to Fill Stitch | Above approximately 300 pt (30 mm) | Helps maintain coverage on very wide designs. |
| Stitch Density | 1.5–1.7 pt | Provides tighter coverage to hide the foam. |
| Underlay | Manual edge walk or center walk; 20–25 pt stitch length | Stabilizes the foam without excessive bulk. |
| Column Ends | Capped satin ends | Prevents foam from showing at the ends. |
| Tie-in / Tie-off | 5 stitches | Locks the column securely. |
Note: According to the article, 1 pt = 0.1 mm. Test settings on matching scrap fabric before production.
(Note: Melco’s values use point units where 1 pt = 0.1 mm. Always verify your foam gauge before hitting start).
Choosing the Right Embroidery Foam Thickness
Choosing the right height of foam dictates the entire feel of your 3d puff embroidery digitizing project. Selecting the wrong depth will instantly ruin an otherwise great design.
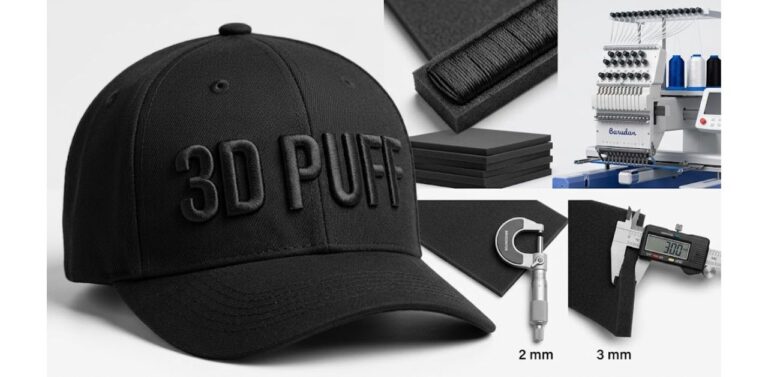
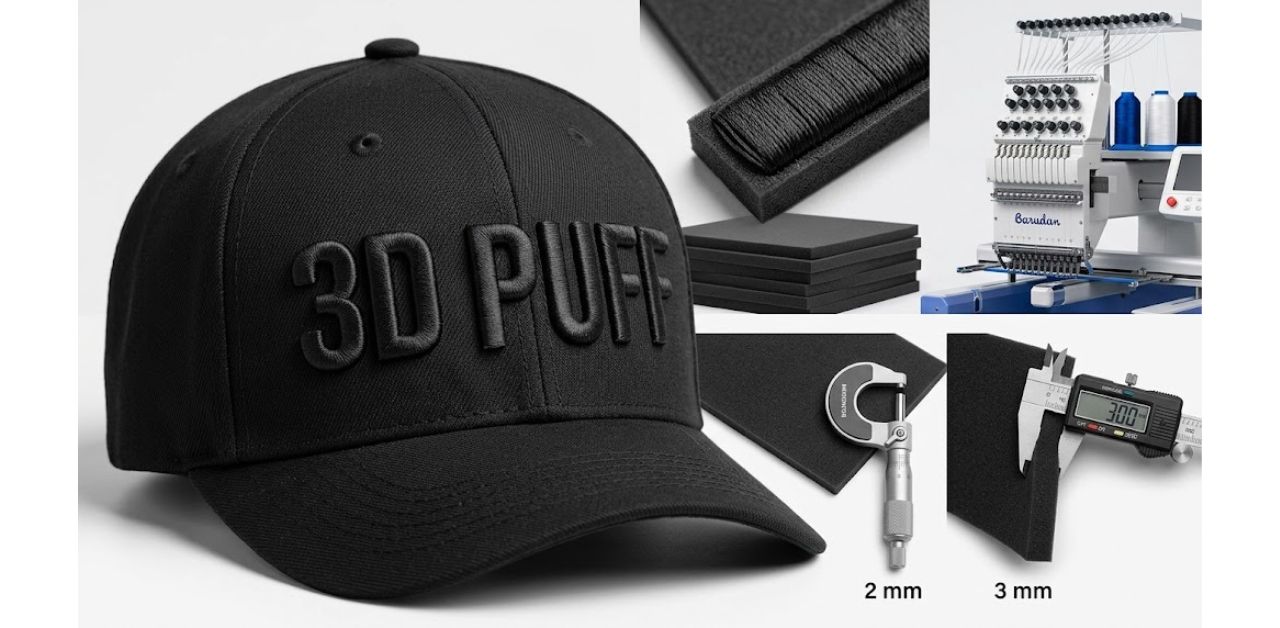
- 2 mm Foam: Ideal for finer text and smaller letters. It yields a cleaner, more controlled look where legibility is critical.
- 3 mm Foam: The industry standard for bold, dramatic height on large letters and simple geometric shapes.
- The 5 mm Ceiling: As noted in industry guidelines, avoid going above 5 mm. When the needle shank is at 6 mm or greater, the needle shank is within the foam cavity and causes birdnesting and thread breakage.
- Color Coordination: Ensure that your foam is well-matched with your top thread color in order to prevent any sort of visibility through it.
- Scaling Up: Larger foam demands larger columns as well as increased thread tension for wrapping.
Mini Tip: Always try out your file on a scrap made of the same garment fabric. Foam, fabric elasticity, and machine settings vary each time.
Satin Stitch Column Width: Minimum, Maximum, and When to Switch to Fill
Regarding the issue of puff embroidery digitizing, column width will tell you if your satin stitch will sufficiently bury the foam underneath.
- The Safe Range: Maintain your satin stitch columns between 30 and 110 pt (about 3 to 11 mm).
- The Minimum Trap: Anything less than 30 pt will fail to cover the foam sufficiently and create rough edges.
- The Maximum Threshold: Columns wider than 110 pt lose their structural tension, causing the thread to sag. For massive lettering exceeding 300 pt (approx. 30 mm), switch the object to a specialized fill stitch.
To see how standard satin lettering compares to fill and run stitch types in software programming, read our breakdown on how satin differs from fill and run stitches.
Density, Underlay, and Capped Ends
Density is where 3d puff digitizing differs most from regular lettering. Because foam creates upward physical volume, your stitches need to pack tighter to completely mask it.
- Tight Density: Aim for 1.5 to 1.7 pt density to ensure complete coverage over the embroidery foam.
- Clean Underlay: Use a manual edge walk or center walk. Avoid heavy automatic underlays that shred the foam before the satin layer even begins.
- Capped Ends: Never leave your satin columns trailing off into nothing. Cap every end securely so the foam cannot push out when tension pulls on the fabric.
- Pull Compensation: Because raised satin pulls hard horizontally, adjust your pull compensation accordingly. For a deeper dive into managing distortion, review our guide on compensating for pull on raised designs.
Caps vs Jackets: Adjusting Your Settings
Stitching 3D Puff Embroidery on a structured baseball cap is totally distinct from doing it on a soft cotton hoodie.
- Caps: Highly curved and very stiff. Always use thin 2 mm embroidery foam along with thick, easy-to-read letters to prevent any distortion in cap panels.
- Jackets and Hoodies: Flatter material with more stability, but stretchy materials need proper backing. Here, 3 mm foam performs extremely well if hooped properly.
- Machine Tweaks: Make sure your machine works perfectly by installing a larger needle (such as the 90/14 sharp) along with lifting the presser foot up higher for the foam and reducing your production rate to about 700 stitches a minute.
Common Mistakes: Why Foam Shows Through
Even professional shops find themselves fighting foam peek-through problems from time to time. To avoid this problem, make sure you are not making one of these mistakes:
- Columns too narrow: The satin stitch is unable to cover the entire height of the foam.
- Loose density settings: Stitches are placed too far from each other.
- Uncapped ends: Foam comes out of the open ends of the satin column.
- Incorrect underlay: Overly heavy underlays split the foam early.
- Wrong foam color: Highly contrasting colors of foam come through easily with light-colored threads.
When the sewing is done, carefully remove any excess foam and use an embroidery heat gun at low heat to reduce any remaining foam fuzz.
When to Outsource Your Puff Files
Creating production-ready files that balance column width, foam thickness, and pull compensation takes considerable time. Trial-and-error wastes valuable garments, expensive embroidery foam, and hours of machine downtime.
Infinite Digitizing provides expert 3d puff digitizing services tailored for commercial embroiderers across the U.S. Whether you are running complex logos on structured caps or clean corporate text on fleece jackets, our professional 3d puff embroidery digitizing services ensure flawless results from the very first stitch. If you are searching for reliable 3d puff digitizing services in the USA, let our seasoned team handle the programming.
Final Takeaways
Learning to do 3D puff embroidery is very precise work, from balancing the foam thickness and column width to density and the machine settings. Using industry standards such as Melco’s standards and practicing on scraps of fabric will ensure no more peek-throughs and high-quality results every time on custom caps and jackets.
Save valuable time and material waste with Infinite Digitizing’s fast, reliable 3D puff embroidery programming designed for flawless first-stitch results.
FAQs
1. What foam thickness is best for 3D puff embroidery?
A: Embroidery foam at 2–3 mm suits most designs. Melco advises 5 mm or thinner. Use 2 mm for small text and 3 mm for bold lettering.
2. What is the ideal column width for 3D puff satin stitches?
A: Satin stitch columns of about 30–110 pt (3–11 mm) work well. Beyond about 30 mm wide, switch to a fill stitch for better coverage.
3. Why does foam show through the stitches?
A: Usually narrow columns, loose density, uncapped ends, or a foam color mismatch. Tighten density, widen the column, cap the ends, and match foam to thread.
4. How much stitch density does 3D puff need?
A: Aim for about 1.5–1.7 pt, which is tighter than standard satin, so the stitches fully cover the foam. Always test on scrap.
5. Can you use the same foam thickness on caps and jackets?
A: Not always. Caps usually need thinner foam and simpler shapes, while stable jackets can take thicker foam. Retest the settings per garment.