Misplaced logos and puckers can destroy a perfectly finished piece of clothing. Before throwing it away, just breathe and relax. With the proper method, it will be possible to save items from destruction without causing damage to the cloth. Whether you’re handling a faulty prototype or an item from the wrong embroidery digitizing files, extraction is your solution. This guide offers guidance on safe removal, tool selection, and professional advice.
Why Embroidery Removal Damages Fabric
If you have ever tried to peel threads right from the face of the shirt, you know how easily fabric wrinkles, pulls, and tears. This issue is usually traced back to the very beginning of the process. A poorly constructed file designed by an inexperienced embroider digitizer typically contains very dense stitches and heavy underlays, which grip very tightly to the fiber of the fabric.
With the pull coming from the front, there is nowhere for these tight stitches to go except being pulled along with the thread. Fabrics such as knits, silk, and lightweight cottons do not fare well with high needle counts and stabilizers.
To help avoid these problems in the future, it’s a good idea to check common design file mistakes before submitting the layout for production.
Tools You Need Before You Start
Fabric cutting typically occurs when individuals employ kitchen scissors or blunt blades due to their impatience. A proper tool kit helps keep the entire procedure neat and controlled.
| Tool | Best For | Pro Tip |
|---|---|---|
| Seam ripper | Cutting bobbin threads | Use a sharp, fine tip to slip under tight loops |
| Embroidery scissors | Trimming tight satin stitches | Curved blades protect fabric from accidental snips |
| Electric stitch eraser | Dense logos, thick fabrics | Reserve for sturdy, heavyweight materials only |
| Tweezers + lint roller | Clearing loose thread | Finish with a gentle sweep to pick up tiny remnants |
| Steamer or iron | Relaxing needle holes | Always use a pressing cloth to protect the surface |
Arrange your work area under adequate lighting conditions. If need arises, use a magnifying glass for better visibility of the distinction between the garment’s thread and the ornamental stitch.
Step-by-Step: Remove Machine Embroidery Safely
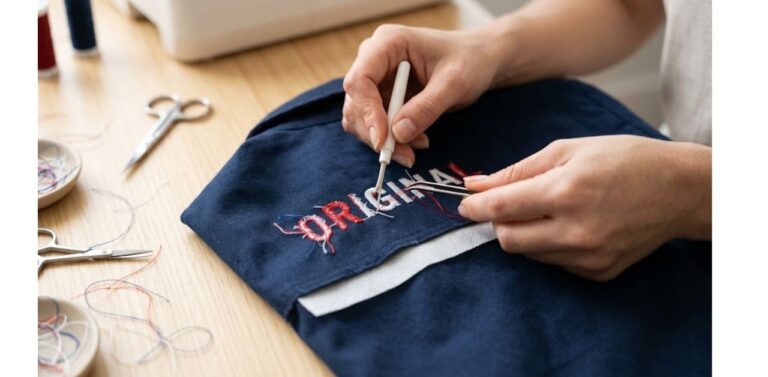
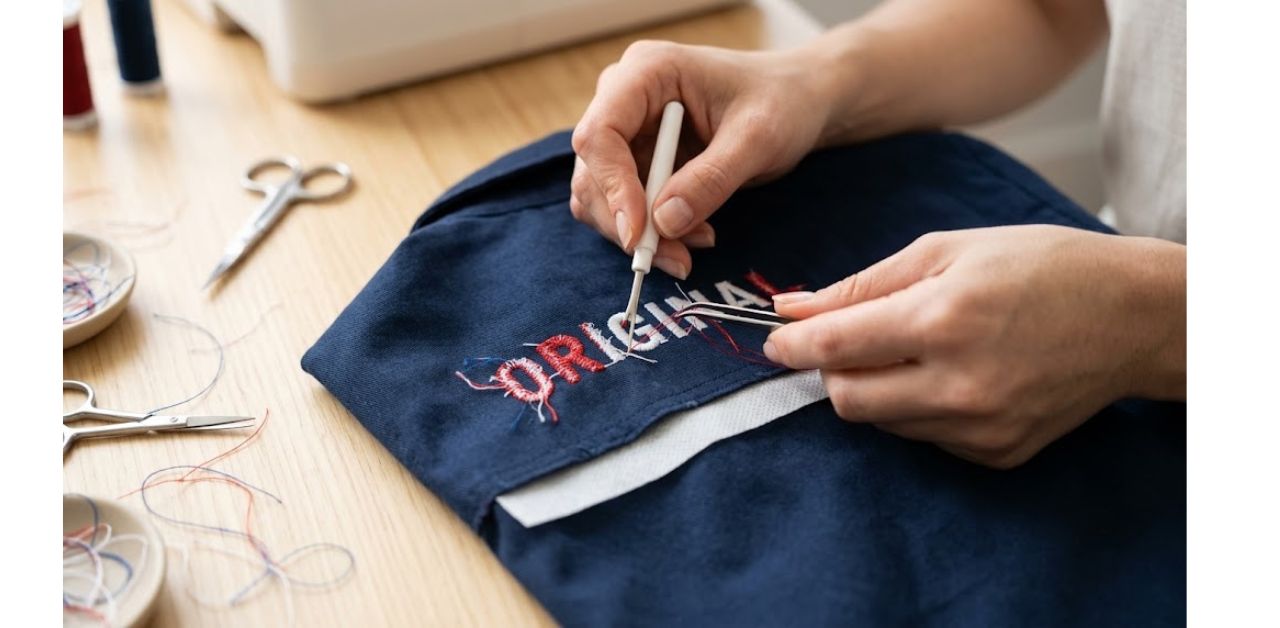
Going slowly is key when working on machine embroidery repair jobs. Rushing through this process will only lead to snagged fabric. Here’s a step-by-step guide on how to safely remove your machine embroidery:
- Turn the Garment Inside Out: Identify the bobbin threads on the other side of the design. The bobbin threads are where you should always start your attack because they are the locking threads of the embroidery design.
- Removing the Bobbin Stitches: Gently work the blade of your seam ripper into the bobbin stitches. Do this in small sections, instead of attempting to tear through long segments of them all at once.
- Lift the Top Threads: Turn the fabric back around so you’re looking at the front side. Using fine-tipped tweezers, remove the loose top threads. They will come off easily because the locking bobbin stitches have been removed.
- Peel Away the Stabilizer: Turn your project over to the reverse side and gently remove the stabilizer backing. If they don’t come off easily, or have adhered themselves to the stitches, use a pair of curved embroidery scissors to cut them away without damaging the fabric.
- Clear Leftover Fuzz: Use a lint roller to go over both sides of your fabric to get rid of any remaining bits of thread and other bits of lint embedded into the weave of your fabric.
- Press and Relax the Fabric: Press the area from the reverse side with a hot iron and a wet pressing cloth to help fibers of the fabric relax into their initial position.
For more detailed information on working with backing material, see our complete guide for different stabilizer types to get proper results in your machine embroidery projects.
How to Get Rid of Needle Holes
When the thread comes out, you may realize that there are small holes left behind by the needle. Such marks can be easily removed from stable fabrics.
- Applying Steam: Place your steamer or iron close to the area and let the compressed fibers loosen up.
- Weaving Rub: Gently rub the woven section utilizing your finger or some blunt object that can assist the threads settle down.
- Damping and Pressing: A moist pressing cloth is all you require if you are working on fabrics that include cotton and linen.
- Washing and Air Drying: Wash the item normally and air dry to restore its natural form.
If you cannot get rid of the holes, it will be very easy for you to cover up the holes with a completely new design.
Removing Embroidery from Caps and Jackets
Working with structural items such as caps and lined jackets will bring a few additional complications.
- Caps: The buckram base and curved parts restrict your movement. Make shorter cuts using the seam ripper and move carefully near the crown seams to keep the shape of the structure untouched.
- Jackets: Examine the inner lining. You may need to take out a small section of the lining pocket or hem so that you can get to the back of the embroidery, and then stitch it shut again when you’re done.
- Heavy fabrics: Leather, nylon, and thick canvas usually reveal needle marks easily. Consider the risk involved before beginning your work on expensive coats.
How to Avoid Removing Embroidery in the First Place
The easiest way to prevent the necessity of removing your embroidery is not to have to remove it in the first place. Proper embroidery digitizing will take care of all potential issues such as wrinkles, thread breakage, or improper stitching pattern before the needle starts embroidering your fabric.
- Test Stitching: Always conduct the test on a fabric similar to the one you intend to use in your final design.
- Match the Stabilizer Weight: Pick among cut-away, tear-away, and wash-away depending on the stretchability and weight of your fabric.
- Re-check the details: Verify spelling, size, and color of the design before transferring the files to the sewing machine.
If your machine is skipping stitches and having trouble with thread nests, it may be useful to revisit some problems with missing stitches. Correct digitizing for embroidery, along with great custom embroidery digitizing specific to your fabric, will save you every time.
Get Clean, Error-Free Files from the Start
Starting with a great file eliminates costly rework. Infinite Digitizing offers professional embroidery digitizing services that drastically reduce the need for stitch removal. We ensure your designs stitch correctly right from the start, whether you need expert online embroidery digitizing or a dedicated embroidery digitizer for your brand.
Ready to eliminate design flaws and boost your production efficiency? Explore Custom Embroidery or request a free quote today!
Final Takeaways
Embroidery removal needs patience, precision, and tools, which must begin from the bobbin side to stop damage to the fragile material. But the most effective way is to prevent making mistakes by designing, using quality stabilizer, and good digitizing in advance. Professional assistance guarantees a perfect outcome right from the first stitch.
Rely on Infinite Digitizing’s industry-leading precision to ensure your designs stitch correctly right from the start, every single time.
FAQs
1. How do you remove embroidery without damaging fabric?
A: Cut the bobbin threads using a seam ripper from the backside and remove the top thread. Lift the top thread and peel off the stabilizer.
2. What tools are best for removing embroidery stitches?
A: Seam ripper with a thin blade, embroidery scissors, tweezers, and a lint roller. Also, an electronic stitch eraser can be used for thick fabric.
3. How do you get rid of needle holes after removing embroidery?
A: Steam the part, rub the fabric’s weave carefully, then iron it with a pressing cloth. Wash and dry it as usual.
4. Can you remove embroidery from a cap or jacket?
A: Yes, with shorter cutting and being careful with backing and lining. The leather and nylon materials will have visible needle holes left after embroidery removal.
5. How can you avoid having to remove embroidery in the first place?
A: Try stitching on test pieces, choose a proper stabilizer, and use a file created by digitizing for embroidery professionals.