Stopping mid-stitch to mend worn-out or torn threads will only be wasteful, messy, and spoil the clothing. Preventing breaks requires balancing physical machine setup, such as tension and needle health, with file-level execution. Avoid unnecessary downtime by knowing what causes problems mechanically, getting rid of stitch density problems, using the proper stabilizer, and making sure your embroidery digitizing files are optimized.
What Causes Thread Breaks in Machine Embroidery?
When something goes wrong in the process, it is tempting to say that it must be something in the thread, but often things are not quite that simple.
- Excessive tension: Over-tensioned top thread stretches beyond its breaking point and makes rayon or polyester thread susceptible to breaking.
- Needle problems: The use of needles with a small eye size, a bent needle shaft, or a dull point causes excess friction, which will shred the thread as it passes through.
- Poor Thread quality: Thread with low fiber strength, inadequate twisting, irregular coating, or old and dried-out thread cannot withstand tensile strength.
- Machine wear and tear: Small burrs on the hook, the needle plate is not smooth, wear on the tension disks, or lint will cause snags in the middle of the sewing process.
- Incorrect threading: Not going through all guides, not putting thread properly into tension discs, or the wrong position of the spool can cause problems.
These are primarily machine-side issues. If your mechanical setup checks out and breaks still cluster around a specific design, you need to look at the file.
Thread Breaks: Cause-and-Fix Table
| Cause | Warning Sign | Quick Fix |
|---|---|---|
| Tension too tight | Snapping, fabric puckering | Loosen top tension in small steps and test |
| Wrong or dull needle | Shredding, skipped stitches | Change needle and match its size to the thread and fabric |
| Poor or old thread | Fraying, uneven thickness | Switch to quality thread and store it in a dry, clean place |
| Worn needle plate or burrs | Breaks at the same spot | Inspect the plate and polish or replace damaged components |
| Bad threading | Random breaks, thread nests | Completely rethread from the spool through to the needle eye |
| Dense stitching in file | Breaks repeat in one localized area | Reduce stitch density in the design file |
How Stitch Density Leads to Thread Breaks
Professional embroidery digitizing relies heavily on managing how closely stitches pack together on a fabric substrate. When a file is built with an excessively high stitch density, the needle repeatedly punches into nearly identical spots. This repeated physical impact creates localized friction, builds up heat, and subjects the thread to extreme fatigue.
Over-dense areas also lock up the fabric, preventing natural flexing away from the descending needle. Ignoring push and pull compensation strains your thread until it snaps. Working with an experienced embroidery digitizer ensures your stitch counts match your fabric weight.
Design-File Mistakes That Break Thread
Hardware adjustments cannot fix an inefficiently designed file. Professional digitizing for embroidery avoids common programming errors:
- Overlapping Objects: Layering various shapes on top of one another results in heavy barriers of threads.
- Micro-stitches: Very tiny stitches and extremely fine text cause the needle to repeatedly penetrate in a very small area.
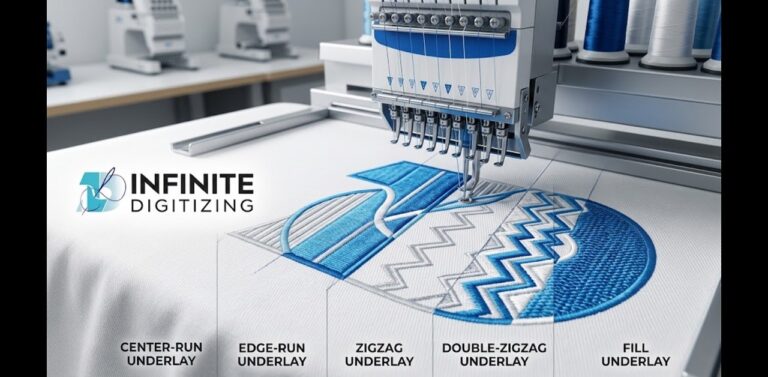
- Missing underlay: A lack of an edge walk or lattice underlay causes the stitches to sink and stretch.
- Excessive jumps and trims: Unnecessary travels across the design increase the risk of birdnesting.
A clean file built by a knowledgeable professional accounts for the unique interaction between needle, thread, and textile rather than just trying to mimic flat artwork on screen. For more details on what to avoid, check our guide on common digitizing mistakes.
Stabilizer and Fabric: The Overlooked Factor
The foundation of your stitch-out dictates how well your thread behaves. Using the wrong stabilizer or an insufficient GSM weight lets the fabric shift and flag with every needle stroke. This vertical movement robs the machine’s timing of stability, pulling the thread at unnatural angles and causing sudden snaps.
- Select your cut-away, tear-away, or water-soluble stabilizer according to the stretch and weight of your fabric.
- Do not try to sew through coated or heavy fabrics using a standard needle and lubricant without altering your needle size or lubricant.
For more information about stabilizer options, check out our guides on how to use different stabilizers for embroidery and troubleshooting what causes missing stitches.
Thread Break Troubleshooting Checklist (Mid-Run)
If your machine stops working because of a damaged thread, follow this short list before you resume:
- Rethread the entire machine from the spool cone all the way through to the eye of the needle.
- Check your needle under a magnifying glass; if it’s bent or blunt, or if it doesn’t match your thread weight, then you have to replace it.
- Ensure that your bobbin case is clean and without any lint, as well as that your bobbin is even without any loose loops.
- Get rid of lint bunnies lurking in the rotary hook and tension mechanism area with a brush or air duster.
- Make micro-adjustments to your upper tension and run a test on a scrap piece of matching fabric.
- If the break happens at the same coordinate every single time, flag the file for digital inspection.
Prevention Routine for Fewer Thread Breaks
A consistent approach always outperforms crisis management. Maintenance done daily and weekly will help you save a lot of time:
- Keep replacing your needles frequently; try to change them after 8 to 10 hours of sewing or the minute you start noticing signs of wear.
- Test-stitch all intricate designs or any new designs on samples before sewing them on expensive materials.
- Buy only good quality thread, and keep the threads in a cool, clean, dry place away from direct sunlight.
- Always maintain a cleaning schedule as per your machine manufacturer’s recommendation.
- Keep a record of the exact tensions and needles you should use when working on specific fabrics.
When to Get Professional Help
If your machine is clean, correctly threaded, and uses a fresh needle, but the design still breaks thread, the vector file itself may be flawed. Premium embroidery digitizing services use vector files to get rid of extra thread buildup.
When looking for an embroidery digitizing service, make sure that the service provides fabric-dependent settings, smart density control, and stitch-out samples. To find the best embroidery digitizing services, you should ask for the test files and underlay instructions.
Ready to eliminate frustrating snaps for good? Get a Digitizing Quote →
Key Takeaways
Preventing thread breaks needs to involve the right maintenance, the correct choice of needle and thread, and well-designed files. By having a consistent process of prevention, solving problems in stitch density, and using the appropriate stabilizer, you can avoid unnecessary stops in production and ensure a quality embroidery session every time.
Stop thread breaks with Infinite Digitizing, using expert stitch density and custom underlays for seamless embroidery production and flawless garments.
FAQs
1. Why does embroidery thread keep breaking?
A: Causes include excessive tension, dull or improperly sized needles, old or weak thread, improper threading, machine burrs, or overly dense files.
2. Can bad digitizing cause thread breaks?
A: Yes, overlapping objects, micro-stitches, missing underlay, and excessive trims create thick roadblocks that snap thread.
3. How does stitch density affect thread breakage?
A: High density causes repeated needle impacts, generating localized friction, heat, and extreme fatigue that snaps the thread.
4. What needle and tension settings reduce thread breaks?
A: Match the needle size and type correctly to your thread, use fresh needles, and maintain balanced, moderate top tension.
5. How do you fix thread breaks in a dense design?
A: Reduce stitch density in the source file, ensure proper underlay, and use an appropriate stabilizing backing.